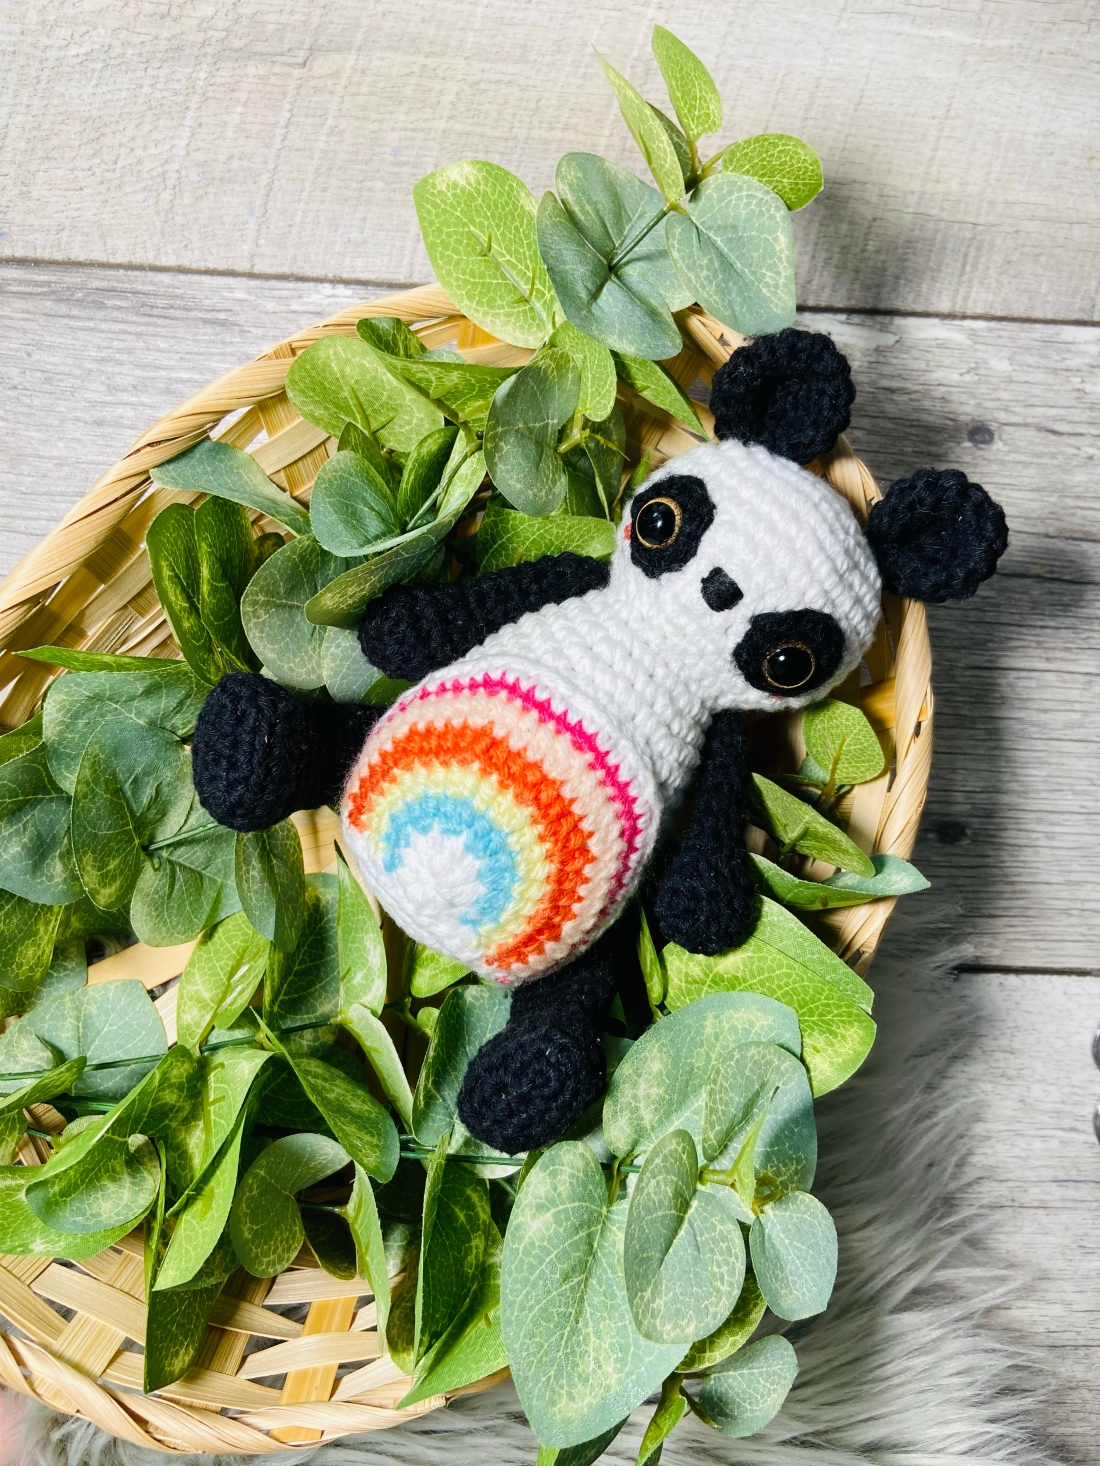
This panda amigurumi pattern is the second in my rainbow collection. After making Bianca the bunny, I knew I wanted to turn the “Rainbow Buddies” – as my two year old calls them into a collection, thus the idea for Piper the Panda was born. I knew I wanted her to be unique, but also conform to the same vibe as Bianca. Below you’ll find the pattern in table format and pictures detailing how I made her.

Materials:
- Yarn: I used medium weight 100% cotton yarn (2mm wide) in white for the head and body and black for the ears, arms, legs, and tail. For the rainbow I used medium weight acrylic yarn (2mm wide) in white, cyan, yellow, orange, peach, and pink.
- Tapestry Thread: white and pink
- 15 mm safety eyes with brown irises
- Polyfil to stuff

Tools:
- 3.5mm/E crochet hook for head, body, arms, legs
- 3 mm/D crochet hook for rainbow
- Tapestry needle
- Stitch markers
- Scissors

Abbreviations:
- mr – magic ring
- sc – single crochet
- FO – fasten off
- ch – chain
- st – stitch
- sts – stitches
- BLO – back loop only
- hdc – half double crochet
- inc – increase
- dec – decrease (I use invisible decreases)
- sl st – slip stitch
- () – work instructions within parentheses as many times as directed
- * – perform instruction as many times as indicated
- mm – millimeter
- pattern written in US/Canadian terminology
Pattern
Eye Patches: to be worked in continuous round. I used black medium weight yarn and a 3.5mm crochet hook.
| Round | Instructions | sts |
| 1 | 6sc in mr | 6 |
| 2 | inc in each st around, FO, leave long tail | 12 |


Head & Body: to be worked in continuous round, I used white medium weight yarn and 3.5mm crochet hook.
| Round | Instructions | sts |
| 1 | start by forming the head. 6sc in mr | 6 |
| 2 | inc in each st around | 12 |
| 3 | (1sc, inc)*6 | 18 |
| 4 | (2sc, inc)*6 | 24 |
| 5 | (3sc, inc)*6 | 30 |
| 6 | (4sc, inc)*6 | 36 |
| 7-11 | sc in each st around | 36 |
| 12 | (4sc, dec)*6 | 30 |
| 13 | (3sc, dec)*6 | 24 |
| 14 | (2sc, dec)*6 | 18 |
| 15-16 | sc in each st around *2 rounds | 18 |
| Push safety eyes through the center of the eye patches, and line them up on the head so that the back of the safety eyes fits between rounds 10 & 11 with 7 sts between. Put the back of the safety eyes on from inside the head. Stitch the eye patches to the face using the yarn tails. Embroider nose between rounds 10 & 12 centered between eyes with black thread Embroider Cheeks just below the eye patches Stuff head | ||
| 17 | Begin to form body. (2sc, inc)*6 | 24 |
| 18 | sc in each st around | 24 |
| 19 | (3sc, inc)*6 | 30 |
| 20 | sc in each st around | 30 |
| 21 | (4sc, inc)*6 | 36 |
| 22-30 | sc in each st around for 9 rounds. Begin to stuff body. | 36 |
| 31 | (4sc, dec)*6 | 30 |
| 32 | sc in each around in BLO | 30 |
| 33 | (3sc, dec)*6 | 24 |
| 34 | (2sc, dec)*6. Finish stuffing. | 18 |
| 35 | (1sc, dec)*6 | 12 |
| 36 | 6dec, close mr and FO |


Place eyes between rounds 10 & 11 with 7 sts between them. Stitch nose between rounds 10 & 12. Stitch blushing cheeks between rounds 11 & 12. Stuff head.


Begin to form neck and body. Close mr at the bottom.
Ears: Worked in continuous round using black medium weight yarn and 3.5mm hook. Make 2.
| Round | Instructions | sts |
| 1 | 6sc in mr | 6 |
| 2 | inc in each st around | 12 |
| 3 | (1sc, inc)*6 | 18 |
| 4-5 | sc in each st around | 18 |
| 6 | (1sc, dec)*6 FO, leaving long tail | 12 |
| st bottom of ear closed to create 6 sts, then st first st to last st to curve and slightly crease the ear and create a round base to st to the head. | 6 |


Stitch bottom of ear shut to make 6 sts, then stitch first st to last st to form a round base to stitch on to the head.
Arms: Worked in continuous round using same yarn and hook as ears. Make 2.
| Round | Instructions | sts |
| 1 | 6sc in mr | 6 |
| 2 | inc in each st around | 12 |
| 3-4 | sc in each st around for two rounds | 12 |
| 5 | 6dec around, stuff hands | 6 |
| 6-12 | sc in each around for 7 rounds, stuff lightly. Close mr, FO leaving long tail | 6 |


Make 2 arms, stuff hands only.
Legs: Started on both sides of a foundation chain and then worked in continuous rounds using same yarn and hook as arms. Make 2.
| Round | Instructions | sts |
| 1 | – form a slipknot, ch 6 – starting in 2nd chain from hook make 1 sc in each of next 4 sts – make 3sc in next st to go around the corner, turn work – on other side of chain make 1 sc in each of the next 3 sts – make 2 sc in last st, slst to join. | 12 |
| 2 | (1sc, inc)*6 | 18 |
| 3 | sc in BLO of each around | 18 |
| 4 | sc in each around | 18 |
| 5 | (1sc, dec)*6 | 12 |
| 6 | 4sc, 2dec, 4sc, stuff foot | 10 |
| 7-13 | sc in each st around for 7 rounds | 10 |
| 14 | 5dec, close mr and FO, leaving long tail | 5 |

Make 2 legs, stuffing feet only.
Tail: To be worked in continuous round using same yarn and hook as the legs.
| Round | Instructions | sts |
| 1 | 4sc in mr | 4 |
| 2 | inc in each st around | 8 |
| 3 | (1sc, inc)*4 | 12 |
| 4 | (1sc, dec)*4, F0 leaving long tail | 8 |

Rainbow Belly: I used medium weight yarn in white, cyan, yellow, orange, peach, and pink and a 3.0mm crochet hook. The first chain of each ring counts as a stitch. Attach next color to the top of the chain in the previous ring. Feel free to use whatever colors you prefer!
| Round | Instructions | sts |
| 1 – White | in mr ch 2 and make 7hdc, FO, but leave as a semi circle | 8 |
| 2 – Cyan | attach cyan yarn (see note above), ch 2, 6hdc inc, hdc, FO | 14 |
| 3 – Yellow | attach yellow yarn, ch 2, (1hdc, hdc inc)*6, hdc, FO | 20 |
| 4 – Orange | attach orange yarn, ch 2, (2hdc, hdc inc)*6, hdc, FO | 26 |
| 5 – Peach | attach peach yarn, ch 2, (3hdc, hdc inc)*6, hdc, FO | 32 |
| 6 – Pink | attach pink yarn, ch 1, (4sc, inc)*6, sc, FO | 38 |
| 7 – White | attach white yarn, ch 1, sc in each st around (38), then sc evenly across the bottom to form a clean border. I did 20 sts across the bottom, approximately 10 per side of the rainbow. slst to first st, FO and leave long tail. | 58 |


Form sc evenly across the bottom of the rainbow. A good rule of thumb is 1 st for each sc row and 2 for hdc rows. I did 20 sc approximately 10 on each side of mr. Typically you would add 3 sc to go around each corner, but I didn’t do this because I wanted the rainbow to curve around the panda’s body.
Assembly

Gather all the pieces of your panda.


Mark out where you want to put the ears. I placed mine between rounds 4 & 6 across the center of the head.


Pin rainbow to determine placement. I lined mine up along the bottom of the panda’s belly where the BLO round was. Stitch on the rainbow using the long tail.


Stitch on arms. I lined them up so the back of the arm is in line with the back of the ears. Stitch between the body and head.


Determine placement for legs. I lined the back of the legs up with the back of the arms and stitched it on so that it is still moveable to be played with, but can support the panda when it’s sitting up.

Stitch on the tail. I placed mine between rounds 27 & 30 and between the backs of the panda’s legs.
Weave in all your ends securely. Enjoy your adorable rainbow buddy!


Subscribe to See More
For more ideas, follow me on Instagram @the_walnut_grove and pin one of these images to Pinterest to refer back to. Check out Bianca Bunny to add another Rainbow Buddy to your collection. Thanks for the support!
Happy Crafting!

